

Anybody On?
A Raspberry Pi project to let you know if your media is currently being viewed.
Ever been curious if anybody is currently looking at your website, watching your YouTube video, or on using your mobile app RIGHT NOW, but can't be bothered to open up and sign into Google Analytics?
I've recently launched this blog, my portfolio website and a few other projects, and like most that start up they are still gaining traction. I created this project because something about real-time data fascinates me. I love knowing that "somebody is reading this page right now. Somebody is looking at something that I've made right now".
This post will go into how I accomplished this with a Raspberry Pi, a breadboard and an LED. You can find the code necessary in my Github repository.
Hardware used
- Raspberry Pi
- Adafruit Cobbler and female-female jumper cable
- Breadboard
- (1) 100 ohm
- (1) LED
- (1) Male-male jumper wire
- Network connection from the Pi
Software and Services used
- Rasbian
- IDLE Python 2.7 IDE
- Google Analytics account
- A project implementing Google Analytics
Steps
Note: These instructions assume that you have a Google Developer account and a Google Analytics account already integrated with your website or other media
Software
-
Create a new Google Developer API project
-
Create a Service Account under the new project that you've just created making sure to tick 'Furnish a new private key'. I chose 'P12' for backwards compatibility purposes
-
The P12 certificate should have downloaded
-
-
Place the P12 certificate and scripts in this repository into a folder on your Pi
-
Change the details in the trianglular-brackets in the config file to match our own
-
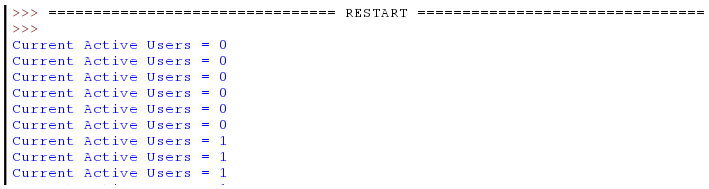
Run the script. If all has went to plan, at this point it should continuously print out the real-time visitor count/how many people are currently interacting with your media
Hardware
-
Use the diagram below as a reference to set up the hardware aspect of this project. 2. Connect your 100 ohm resistor from cobbler row #18 to a row outside the scope of the cobbler, e.g. (16, I) on the breadboard
3. Take the LED and connect the positive (longer) leg to the same row of the resistor, e.g. (16, J) on the breadboard. Take the negative (shorter) leg and connect it to the outer negative rail 4. Finally, take the male-male jumper wire and connect the same outer negative rail to a cobbler row, e.g. (3, J)
-
Re-run
AnybodyOn.pyand visit your website/YouTube video/app after a few seconds of the program producing 'Current active users = 0'. If all has gone to plan, the light should turn green a few seconds after visiting your media.


